


Views: 0 Author: Site Editor Publish Time: 2026-10-01 Origin: Site


Home DIY renovations frequently stall right at the finishing stage. The persistent choice between pure speed and meticulous precision paralyzes many beginners. Choosing the right application method hinges on balancing your available preparation time, desired finish quality, and overall project scale. A wrong decision can lead to endless touch-ups, messy overspray, or visible brush strokes on an otherwise flawless piece.
The spray paint vs brush paint debate matters because it directly dictates your workflow and final aesthetic. This guide evaluates the objective trade-offs between modern aerosol systems and traditional brush applications. We break down prep times, material efficiency, and specific scenarios tailored to each method. You will discover actionable insights to finalize your material checklist confidently. Ultimately, you can ensure your next renovation project looks highly professional.
Spray painting requires up to 70% more prep time (masking/taping) but delivers a factory-smooth, brush-stroke-free finish in a fraction of the application time.
Brush painting offers superior control with minimal setup, making it ideal for localized touch-ups, trim work, and high-wind outdoor environments.
For complex geometries (e.g., spindles, louvers, metal fixtures), modern multi-surface spray paint eliminates pooling and drips associated with liquid brush applications.
Project scale dictates cost-efficiency: Aerosol cans are economical for small-to-medium tasks, while bulk paint and quality brushes yield better ROI for high-square-footage surfaces.
You must rigorously assess the prep-to-paint ratio before starting any task. Spraying requires extensive masking. You need drop cloths, painters tape, and a robust ventilation setup. Protecting adjacent surfaces consumes hours. However, the actual spraying process takes mere minutes. Brushing flips this equation completely. You need minimal taping. You pop the lid, dip your bristles, and start immediately. Yet, the physical application time takes significantly longer. Covering a large dresser by hand consumes hours of meticulous stroking.
Best Practice: Always calculate total project hours. Include masking tape application and removal in your time budget for aerosols. Do not solely measure the active painting phase.
Your performance outcome relies heavily on atomization. Spraying atomizes liquid paint into microscopic droplets. These droplets self-level on the substrate. They create a flat, stroke-free finish mirroring factory standards. Brushing introduces unavoidable physical texture. Bristles leave microscopic ridges behind. High-gloss finishes exacerbate these imperfections. Achieving a mirror-like sheen via brushing usually requires intense sanding between coats. Aerosol layers dry exceptionally fast. This rapid curing allows for multiple light coats in a single afternoon.
Cost considerations heavily influence the final choice. Spraying generates a massive cloud of particulates. Professionals track "transfer efficiency." Standard aerosols typically result in 20% to 40% material loss. This loss stems from overspray and surface bounce-back. Brushing ensures nearly 100% paint transfer to the substrate. You waste almost nothing to the surrounding air. Consequently, a single quart of brushed enamel often covers substantially more square footage than multiple aerosol cans.
Table: Application Method Comparison
Evaluation Criteria | Aerosol Application | Traditional Brush |
|---|---|---|
Prep Time | High (Extensive masking needed) | Low (Minimal setup) |
Application Speed | Very Fast | Slow to Moderate |
Finish Texture | Smooth, factory-grade | Visible strokes, textured |
Material Loss | 20% - 40% (Overspray) | < 5% (Highly efficient) |
Certain projects inherently demand aerosol applications. Furniture restoration ranks highest on this list. Complex geometries frustrate even veteran painters. Wicker chairs, louvered doors, and ornate metal hardware reject traditional bristles. Liquid pools in tight corners. It causes ugly drips and uneven curing. Aerosols penetrate these crevices effortlessly. They guarantee a factory-grade finish on standalone items. You avoid hours of tedious edge-work.
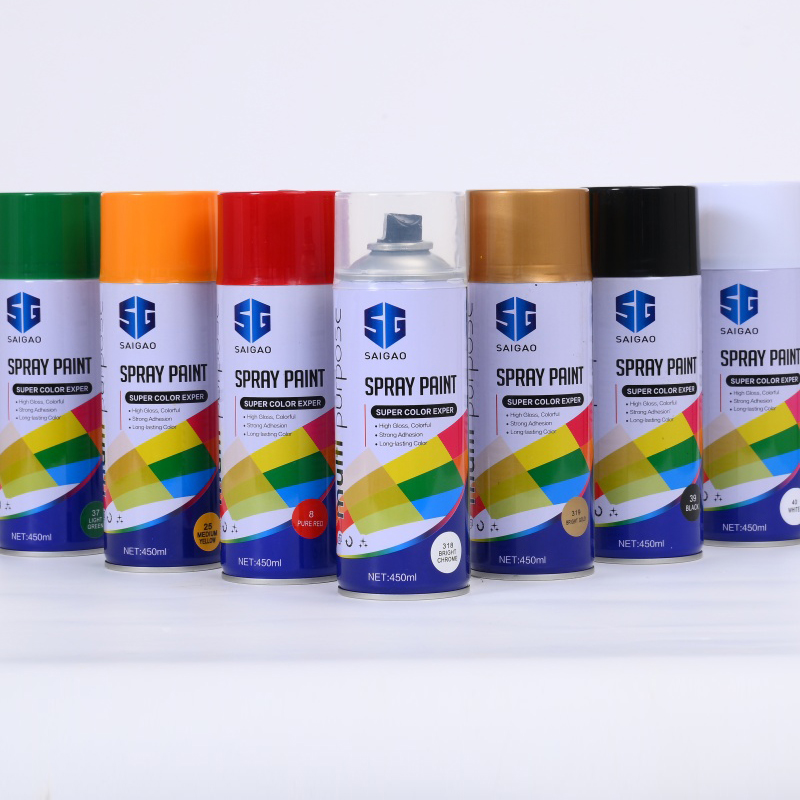
Material compatibility dictates your success rate. Utilizing a multi-purpose acrylic spray paint allows for rapid recoating. It provides excellent adhesion on traditionally stubborn non-porous surfaces. Plastics and metals often cause brush drag. Bristles slide unevenly across sleek materials. Modern acrylic aerosols bond aggressively. They flash off quickly, preventing ugly sagging on vertical metal table legs.
Brushes cannot replicate complex textures. Spraying remains the only viable method for applying a multi-color aerosol spray paint. These specialty cans create hammered metal looks, stone textures, or speckled granite finishes. The internal nozzle specifically regulates particle distribution. It achieves an even, consistent pattern without clumping. Trying to stipple a stone-texture finish by hand usually looks amateurish and uneven.
Environmental control dictates spray success. Best results occur outdoors. Wind ruins atomized patterns, so pick a calm day. Alternatively, use a dedicated spray tent. If working indoors, clear the room entirely. Set up heavy cross-ventilation. Box fans and open windows are mandatory. Confined spaces trap dangerous fumes and cause sticky overspray to settle everywhere.
Common Mistake: Spraying too close to the object. Maintain a strict 10-12 inch distance. Overlapping continuous passes prevents catastrophic dripping.
Traditional bristles dominate specific architectural tasks. Trim work, detailed edging, and small patch repairs demand strict boundaries. Baseboards require pinpoint accuracy. Occupied interior spaces restrict aerosol usage entirely. You cannot evacuate your living room merely to touch up a single door frame. Brushing isolates the task. It keeps the mess contained to a singular, manageable zone.
Manual application eliminates airborne contamination risks. You eliminate the threat of paint particles settling on adjacent floors. Windows and expensive furniture remain perfectly safe. You dictate exactly where the liquid travels. Cutting in ceiling lines requires this exact precision. A steady hand and an angled sash brush outperform masking tape every single time.
Physical friction benefits raw materials. Brushing physically works the heavy liquid into porous or textured surfaces. Raw wood, heavy stucco, and masonry need deep penetration. Bristles force the material into tiny microscopic voids. This action often provides better mechanical adhesion for heavy-duty primers. An aerosol mist sometimes sits lightly on top of rough textures. It fails to penetrate deeply into the substrate grain.
Mother Nature forces specific methods upon us. Brushing remains the mandatory choice for outdoor projects on windy days. Overspray becomes uncontrollable at even five miles per hour. Wind carries fine particles onto neighboring cars, brickwork, and landscaping. Manual application nullifies the wind factor completely. You maintain absolute control regardless of gentle outdoor breezes.
Project scale heavily impacts your material budget. Upfront investment matters. High-quality aerosol cans offer the best return on investment for small tasks. Using a premium multi-surface spray paint eliminates expensive equipment needs. You skip buying heavy HVLP sprayers. You avoid renting loud air compressors. You save money on premium synthetic brush sets. Four cans easily coat a dining chair set flawlessly. It keeps your budget lean and your cleanup minimal.
Scaling Rules for Small Projects:
Calculate surface area accurately before buying cans.
Purchase one extra can to avoid mid-project shortages.
Shake cans vigorously for two full minutes to maximize yield.
Scaling up changes the financial math entirely. Traditional gallons paired with brushes or rollers dominate large square footage. Commercial airless sprayers make sense for full exterior siding. Relying on individual aerosol cans for a backyard fence is heavily cost-prohibitive. The sheer volume required destroys your budget. Furthermore, overlapping dozens of small aerosol patterns on a massive flat wall leads to uneven, noticeable overlap lines. Bulk liquid offers superior economical coverage for massive surface areas.
Inhalation risks separate the two methods drastically. Spray painting mandates strict personal protective equipment (PPE). You must wear respirator masks fitted with organic vapor cartridges. Standard paper masks fail to block atomized VOCs. Eye protection prevents severe chemical irritation. Brushing requires basic ventilation. Opening a window usually suffices for latex paints. The localized application poses significantly lower inhalation risks to the user.
Post-project maintenance influences future usability. Both methods demand specific routines.
Spray: Cleanup involves clearing internal nozzles. You simply invert the can and spray until clear gas escapes. Commercial spray guns require meticulous breakdown. You must thin and flush the lines to prevent permanent internal clogs.
Brush: Manual tools require thorough washing. You utilize specific solvents based on the formula. Water cleans acrylics. Mineral spirits tackle heavy oil-based enamels. Deep cleaning maintains bristle integrity for future usage.
Beginners routinely fail to calculate prep requirements. Underestimating the time and tape required to protect a room represents the number one adoption risk. First-time spray painters ruin carpets and adjacent walls constantly. Fine mist drifts much further than anticipated. Taping off a single kitchen cabinet box easily takes twenty minutes. The actual painting takes three minutes. Acknowledge this masking tax before committing to indoor aerosols.
Shortlisting Logic: Base your final decision on three core pillars. Evaluate the project's complex geometry, assess the specific location (indoor versus outdoor), and determine your personal tolerance for preparation work.
Final Verdict: Use aerosols for complex, standalone items demanding a flawless, mirror-like finish. Default to traditional manual tools for architectural details, minor touch-ups, and interior environments where overspray cannot be contained safely.
Next-Step Action: Finalize your material list today. Explore commercial-grade acrylic aerosols for your next cabinet restoration, or grab a high-quality angled sash brush for your trim work.
A: Yes. A common hybrid approach maximizes efficiency. You brush the main structural elements (like a heavy table base) for maximum durability. You then spray the highly visible top surface for a glass-like finish. Ensure both formulas have compatible chemical bases (e.g., both acrylic or both oil-based) to prevent peeling.
A: Yes. Modern chemical formulations offer highly comparable durability. However, aerosol layers are inherently thinner due to atomization. Achieving the exact same mil-thickness as a heavy brushed coat requires multiple light applications. Always allow proper curing time between these delicate coats.
A: Drip prevention requires different techniques. For aerosols, maintain a strict 10-12 inch distance and use continuous sweeping motions. Never start or stop the nozzle directly over the piece. For manual tools, avoid overloading the bristles. Lightly "tip off" the wet edge with an unloaded brush to level the finish perfectly.

