

Views: 0 Author: Site Editor Publish Time: 2026-05-13 Origin: Site


Drafts act as the silent enemies of modern buildings. They sneak through tiny structural cracks and compromise the comfort of your living space. You might feel a noticeable chill near windows or discover steady drafts along baseboards. Ineffective sealing leads directly to severe energy loss and moisture intrusion. It forces your HVAC system to work overtime and drives up utility costs unnecessarily. When cold winter air enters and warm conditioned air escapes, your entire climate control strategy fails. While PU foam spray is highly effective for air sealing and thermal resistance, improper application carries distinct risks. Careless usage can cause structural warping, incomplete curing, or severe safety hazards. This guide provides a rigorous, compliance-aware framework for selecting, preparing, and applying the material. You will learn specific expert techniques to achieve airtight, lasting seals without the common pitfalls.
Match the product to the project: Select between open-cell, closed-cell, high-expansion, or low-expansion formulas based on the specific cavity and insulation requirements.
Environmental control is critical: Surface moisture, ambient temperature, and humidity directly dictate the curing success and yield of the foam.
Prioritize safety and compliance: EPA guidelines mandate strict adherence to personal protective equipment (PPE) and ventilation protocols during and after application.
Application technique dictates performance: Layering, managing expansion rates, and proper surface preparation prevent common failures like shrinkage or structural damage.
Density plays a major role in how the material behaves. Open-cell structures are lighter and less dense. They leave small pockets of air interconnected throughout the core. This characteristic makes them excellent for acoustic dampening. Sound waves easily get trapped inside the porous structure. However, they remain highly vapor permeable. Moisture can pass right through them. You should restrict open-cell applications entirely to interior walls. Closed-cell varieties offer a completely different performance profile. They pack internal cells tightly together. This creates a much higher R-value per inch. The material cures into a rigid, solid state. It acts as a strict vapor barrier. You need closed-cell products for exterior applications, basements, and highly moisture-prone areas. It completely blocks air and water vapor transmission.
Feature | Open-Cell | Closed-Cell |
|---|---|---|
Density & Structure | Low density, soft, flexible | High density, rigid, dense |
Thermal Resistance (R-value) | Lower (approx. R-3.5 per inch) | Higher (approx. R-6.0 to R-7.0 per inch) |
Moisture Permeability | Vapor permeable (absorbs moisture) | Vapor barrier (water-resistant) |
Best Application Zones | Interior walls, soundproofing cavities | Exteriors, basements, roof decks |
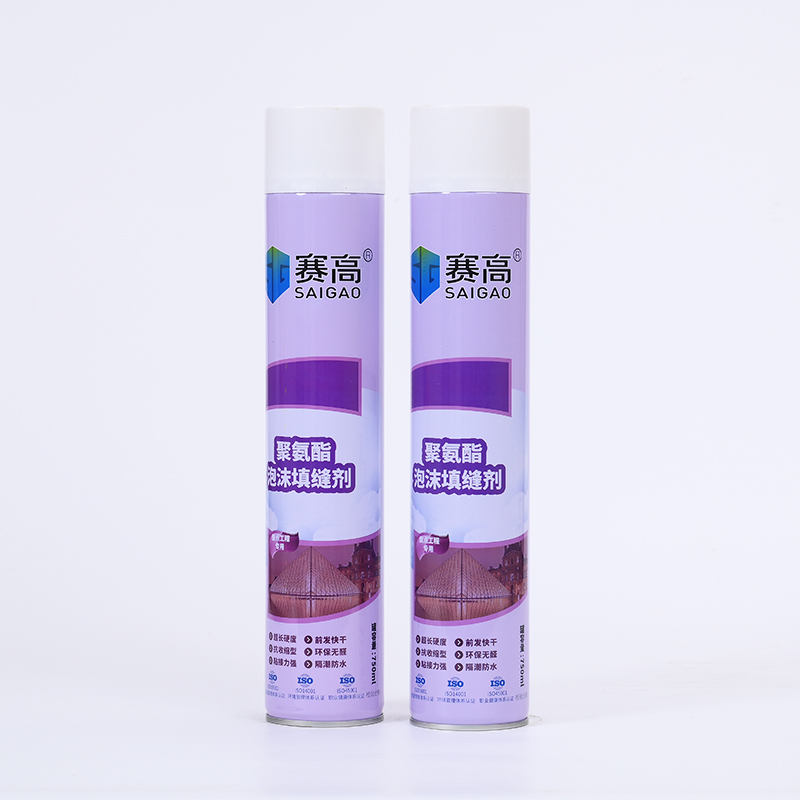
You must always assess the expected volume required before starting. Canned formats deliver supreme convenience for smaller tasks. A single-component product like PU foam spray 750ml is ideal for localized DIY repairs. You can target window drafts, seal door gaps, and fill small voids quickly. They require no heavy machinery or complex hoses. You simply attach the applicator straw and spray. Two-component kits serve an entirely different purpose. Professionals call these pro-rigs. They are absolutely necessary for large-scale residential or commercial cavity installations. They mix two distinct chemicals at the nozzle to generate massive expansion volumes rapidly.
Manufacturers formulate different expansion behaviors deliberately. High-expansion products blow up rapidly immediately after leaving the nozzle. They tackle large, irregular voids efficiently. You use them around wide plumbing penetrations or deep structural gaps. Low-expansion formulas behave much more predictably. They expand minimally once applied. You need these specific formulas for window and door frame installations. They prevent the immense outward pressure from bowing or warping your delicate wooden assemblies.
The chemical composition of these sealants requires serious respect. The Environmental Protection Agency (EPA) mandates strict safety guidelines. Isocyanates serve as the primary reactive component inside the canister. They act as powerful respiratory and skin irritants. You must adhere to specific personal protective equipment (PPE) protocols. Wear thick nitrile gloves to protect your hands from sticky chemical burns. Use safety goggles to shield your eyes from accidental splatters. Wear long sleeves and long pants to cover exposed skin. You need a dual-cartridge organic vapor respirator to filter out harmful off-gassing. Do not rely on simple paper dust masks.
Ventilation requirements remain equally rigorous. You must establish active cross-ventilation during the entire application process. Position exhaust fans in nearby windows to pull stale air outward. The EPA recommends a standard 24-hour vacancy period for interior residential spaces. Allow the area to ventilate and cure fully before anyone returns without appropriate PPE.
The condition of the substrate dictates overall adhesion quality. Target surfaces must be pristine. Remove all dust, grease, and loose debris using a stiff wire brush or a shop vacuum. Dirt prevents the polymer from bonding permanently to the structural frame. Moisture requirements depend heavily on the specific chemical formula. Most single-component (1K) cans rely entirely on ambient moisture to cure. You should lightly mist the target surface using a spray bottle filled with clean water. This simple hydration step accelerates the curing timeline significantly. It also dramatically improves the internal cellular structure of the bead.
Temperature parameters directly determine your final material yield. Optimal ambient room temperatures and internal can temperatures range strictly between 65°F and 80°F (18°C–27°C). If you apply the product when the metal canister is cold, performance drops sharply. You will experience terrible yield. The prepolymer dispenses in a runny, uncontrollable liquid consistency rather than a frothy bead.
Best Practice: Store cold canisters inside a warm room for 24 hours before use. Never heat them directly with open flames or hot water baths.
Common Mistake: Spraying onto bone-dry concrete or wood without misting first. This causes delayed curing and massive shrinkage later.
Proper equipment setup prevents frustrating messes. Start by attaching the professional applicator gun or the provided plastic straw securely to the valve. Ensure the threading is tight to prevent messy chemical leaks at the joint. You must shake the canister vigorously before squeezing the trigger. Do this continuously for a minimum of 30 to 60 seconds. This vital step properly mixes the liquid prepolymer and the propellant gas hidden inside. Without thorough agitation, the chemical reaction falters. The material will spit unevenly from the nozzle and fail to expand.
Physics dictates the correct application posture. Always invert the canister during use. You must spray upside down to utilize the propellant effectively. If you spray upright, the compressed gas escapes rapidly without pushing the dense liquid out. Never fill a cavity completely on your first pass. Fill gaps only 30% to 50% full. You must allow the natural chemical expansion to fill the rest of the void automatically. Deep cavities require a specialized layered approach. Apply the material in multiple horizontal layers. Keep each pass under a maximum of 1.5 to 2 inches thick. Wait for the first layer to become completely tack-free before adding the next one over it. This patience ensures proper atmospheric curing throughout the entire depth. It prevents the soft, uncured core from collapsing under its own heavy weight.
Different architectural areas require different handling techniques. Applying PU foam spray for insulation adapts well to various structural challenges if applied thoughtfully. Around windows and doors, lay down continuous, steady beads. Do not stop and start the flow randomly, as this creates tiny air channels. For pipe penetrations leading outside, the goal is total isolation. Ensure a seamless 360-degree seal entirely around the plumbing fixture. This comprehensive seal blocks air leaks effectively. It also actively prevents insects and rodents from navigating through the building envelope.
Clean and mist the target cavity thoroughly.
Shake the inverted canister vigorously for 60 seconds.
Inject a steady bead filling only 30% to 50% of the visible gap.
Allow the layer to expand and become tack-free.
Apply secondary layers if the cavity exceeds 2 inches in depth.
This represents the most destructive beginner mistake. Expanding polymer exerts immense outward physical pressure as it cures. If you overfill a narrow gap, this brute force has nowhere else to go. It will push heavily against the surrounding structures. It can easily bow door jambs inwards, jamming the hinges. It frequently warps delicate window frames, rendering the sashes permanently inoperable. You mitigate this risk through careful product selection. Strict adherence to low-expansion formulas is absolutely non-negotiable for delicate areas. Maintain strict under-filling discipline at all times. Trust the final expansion process to close the remaining gap.
Sometimes the underlying chemical reaction fails completely. The applied material remains stubbornly sticky for days. It might eventually collapse inward or pull away from the wood substrate over time. This ruins your airtight seal entirely. You prevent this by verifying the expiration date on the canister before purchasing it. Expired chemicals lose their reactivity and stability. Maintain the proper ambient can temperature as discussed previously. Ensure adequate ambient humidity before pulling the trigger. Always remember to mist extremely dry environments. These straightforward steps guarantee a robust, stable cure that resists long-term shrinkage.
Direct sunlight acts as the primary enemy of bare polyurethane. Exposed exterior sections will quickly discolor. They turn a dark, brittle shade of brown within weeks. Eventually, intense UV radiation breaks down the delicate polymer chains completely. The material literally turns to dust and blows away in the wind. You mitigate this inevitable process by covering it promptly. Always trim the exterior excess flat once it fully cures. Cover the exposed face securely. Use high-quality exterior paint, waterproof plaster, or protective architectural cladding to shield it permanently.
Patience guarantees a clean, professional finish. The material transitions through very specific hardening phases. The tack-free time usually occurs in 10 to 15 minutes. At this point, the outer skin no longer sticks to a gloved finger. The cut-time typically ranges from 1 to 2 hours. The material becomes firm enough internally to slice cleanly without tearing chunks out. Full cure requires a full 24 hours. The internal core completes its final chemical hardening sequence. Do not disturb, compress, or cover the area before this critical window closes.
Curing Phase | Typical Timeline | What It Means |
|---|---|---|
Tack-Free | 10 - 15 Minutes | Surface is no longer sticky to the touch. |
Cut-Time | 1 - 2 Hours | Safe to trim away excess material with a knife. |
Full Cure | 24 Hours | Maximum structural hardness and expansion reached. |
Removing the ugly overflow requires the right hand tools. Use a flexible, fine-toothed serrated knife for the best results. A long snap-blade utility knife also provides a very clean cut. Slice the expanded excess completely flush with the wall or frame surface. Keep the blade flat against the surrounding structure. Use a smooth sawing motion rather than a rough chopping motion. This technique avoids gouging the primary seal hidden inside the cavity.
Accidents happen frequently, and cleanup timing is vital. Uncured splatters are highly adhesive and ruin fabrics instantly. You must remove them immediately upon contact. Use a dedicated acetone-based cleaner to dissolve the wet chemical spills. Wipe the area completely clean before it starts to dry. Cured material presents a much harder physical challenge. Chemical solvents will no longer work once the polymer cross-links and hardens. You can only remove hardened spills mechanically. You must resort to vigorous scraping, heavy sanding, or precise cutting to eliminate the hardened residue.
Achieving optimal thermal resistance goes far beyond simply buying a canister. Successful sealing relies heavily on strict environmental control. Safety adherence is just as vital as the product chemistry itself. Managing temperature, humidity, and PPE dictates your overall project success. Your next steps require straightforward logic. First, assess the true scale of the draft or insulation gap. Second, purchase the appropriate product volume for your specific job. Grab high-yield 750ml cans for quick DIY retrofits. Invest in comprehensive two-part kits for major room remodels. Finally, acquire all the necessary protective equipment before you ever squeeze the trigger. Proper preparation prevents structural damage and ensures a seamless, airtight environment for years to come.
A: It is generally tack-free in 15 minutes, ready to cut in 1-2 hours, and fully cured in 24 hours, depending on humidity and temperature.
A: No. Single-component 750ml cans are designed for air-sealing gaps, cracks, and small cavities. Whole-wall insulation requires two-component spray foam systems to achieve the necessary R-value and volume cost-effectively.
A: Closed-cell PU foam is highly water-resistant and acts as a vapor barrier. Open-cell foam is not waterproof and will absorb moisture if left exposed.
A: If uncured, use acetone or specialized foam wipes immediately. Once cured, it must wear off naturally or be gently exfoliated; water and soap will not work. Always wear gloves to prevent this.

